

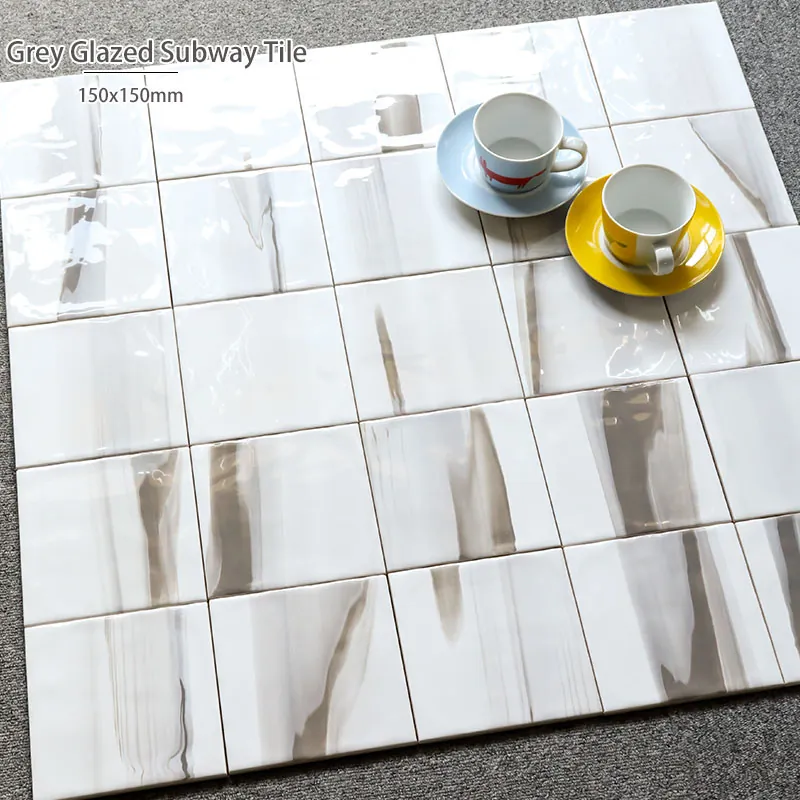
Subway-style tile is often associated with a familiar rectangular shape, but its effect depends on more than the tile itself. Scale, layout, grout, lighting, and surrounding finishes all influence whether it feels quiet or prominent. Start by identifying the wall area and the role the tile should play in the room.
A backsplash, shower niche, and feature wall have different proportions and practical needs. A layout that works across a broad wall may feel crowded in a narrow recess. Measuring each area and planning the edges in advance helps avoid awkward cuts and makes the finished design look intentional.
Match the Tile to the Wall Area
The first decision is how much visual attention the tiled surface should receive. A full wall can create a continuous backdrop, while a smaller section can highlight a sink, cooking area, or architectural detail. When selecting subway look tile, consider whether the surface should blend into the room or serve as a more noticeable design feature. Consider the room’s scale, existing materials, and the sightlines people encounter when entering or using the space.
Use broad wall areas for rhythm
On a large wall, repeating courses establish a clear visual rhythm. A running bond layout offsets each row, while stacked layouts align grout joints vertically and horizontally. The choice changes the character of the surface, so review a drawing or sample arrangement before confirming the pattern.
A light, consistent grout color can let the tile surface read as a unified field. Contrasting grout makes the joints more noticeable and emphasizes the geometry. Neither approach suits every room. Compare grout samples with the tile and nearby finishes under the lighting planned for the space.
Give niches and small sections a plan
A niche has limited width and depth, so tile dimensions and layout affect the cuts at its edges. Measure the opening and consider where full tiles or cut pieces will fall. If the niche is in a shower or another wet area, coordinate tile selection and detailing with the project’s waterproofing and installation requirements.
Small sections such as a vanity backsplash can use the same tile as a larger wall to connect the design, or a different arrangement to create a focal point. Align the layout with nearby edges, shelves, or fixtures where possible. A quick elevation drawing can show whether the pattern will end cleanly at corners and trim.
Choose a Layout That Supports the Design
The same rectangular tile can look traditional, orderly, or graphic depending on how it is arranged. Before selecting a pattern, consider the room’s proportions and what the layout should emphasize. A sample board or scaled sketch helps check how the pattern behaves around openings and at the ends of a wall.
Think through direction and alignment
Horizontal courses can reinforce a wall’s width, while a vertical arrangement can draw attention to height. Check the layout around outlets, mirrors, windows, and cabinetry so cuts do not create an unintended focal point.
For buyers comparing options, subway look tile can suit broad wall surfaces as well as smaller accent areas. Decide where the pattern begins, how it wraps an outside corner, and how it meets adjacent materials. Discuss edge treatment with the installer before ordering, since the intended finish may affect material quantities and the last course.
Use the pattern with restraint
A feature area does not need several competing design elements. A distinctive layout can stand out against simple cabinetry, stone, or painted surfaces. If the tile already has a strong color or finish, a straightforward arrangement may keep the wall from feeling visually busy.
Review the proposed surface from more than one distance. Close inspection reveals grout joints and cuts, while a room view shows how the tiled area relates to furniture and fixtures. This can help the team decide whether to extend the tile or keep it as a contained accent.
Coordinate Finish, Grout, and Installation
Tile appearance changes with light and neighboring materials. Compare samples in the actual room when possible, especially where daylight and artificial lighting differ. Check the tile beside countertop, paint, metal, or wood finishes that will remain in the space.
Grout color influences the apparent pattern, and joint size should follow product guidance and the installation plan. Confirm recommended setting materials and preparation with the project team. For wet locations, ensure the full assembly is designed for that use rather than relying on the tile surface alone.
Make the Details Work Together
A successful subway-style installation comes from coordinating the tile, layout, grout, edges, and room conditions. Measure each surface, map the pattern around openings, and review samples beside nearby finishes. These steps help the tile support the space, whether it covers a broad wall or marks a smaller architectural feature.
JLA Ceramics is a ceramic tile manufacturer offering subway tiles in various sizes, colors, and finishes for residential and commercial projects. They also provide custom tile design and OEM services to accommodate different project requirements. Buyers can visit JLA Ceramics to explore the subway tile collection and discuss suitable options for their next project.
